The Remodeling Series Part 7: The Master Bathroom
This is part 7 of Our Whole-House Remodeling Series.
I hope you enjoyed our main bath remodel that I shared yesterday. While I really like that bathroom, I’m excited to show you our master bathroom because I love it! More than a year later I still walk into it and marvel at the changes.
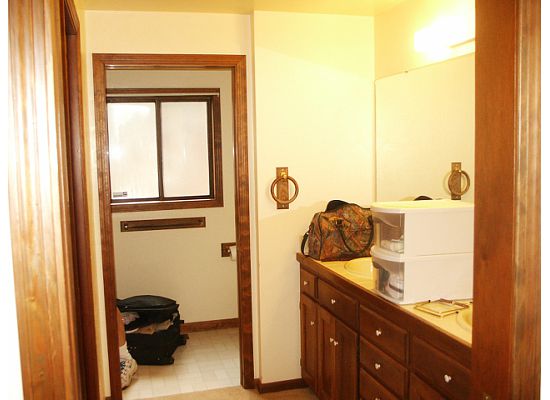
This is what we started with:
Again, how I wish I had remembered to get good before pictures! One day I will learn…maybe.
Here are a few of my least favorite things about this space:
- Repeat of the yellow-gold theme: toilet, sinks, tile, vinyl, shower surround, wall paint – seemingly everything.
- Frosted brown aluminum window like the main bathroom.
- Every piece of wood was dark brown and the vanity was 8 feet long.
- Like the main bath, the lovely wood-and-gold towel bars were repeated here, as well as the 70s sink faucets and huge mirror, except this one was, like the vanity, eight feet long. Too much of me, I can tell you that.
- It was broken into two rooms: a carpeted “dressing area” and a toilet/shower area which were separated by a wall with a pocket door.
- There was another pocket door leading from the bedroom, which scraped on a misplaced nail if you tried to close it.
- It was dark, dark, dark. You needed a light no matter the time of day or season and you couldn’t see outside anywhere in the room. I personally dislike bathrooms with no windows (except maybe powder rooms), which helps explain what drove my vision for this room.
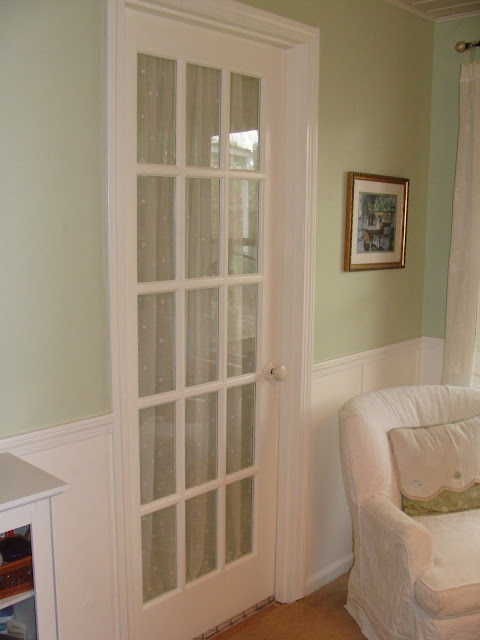
The first thing we did was to replace the pocket door into the bathroom with a french door (hung with a curtain for privacy). We did this about a year after we moved in when we were remodeling the garage into living space. We removed both of the pocket doors here to use as regular doors in the new area because they were beautiful solid wood paneled doors that matched those in the old rooms.

Then we demolished the pocket-door wall separating the vanity area from the shower area in order to create one big space. This is the same view as the before picture – it feels so much bigger, it’s hard to believe it’s the same room.
After we removed the wall we added a long, high window over the tub and replaced the frosted aluminum window with a double hung vinyl that was not frosted so I can look out at the trees and see outside. Of course, part of any good DIY project is making it last a really long time {ahem}, so after removing the wall and adding the windows we didn’t complete the rest of the renovation for about nine, looong months. We lived with exposed pipes, drywall, and studs for all that time.
Then we buckled down, took a week in summer when the kids were out of town and tiled both this room and the other bath. Need I reiterate that I will never tile again? I thought not.
Here’s the complete tour of our Master Bathroom:
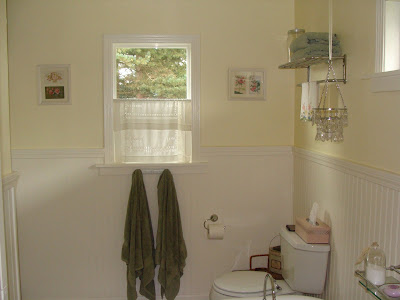
Besides the new window (with another privacy curtain made out of a vintage piece of linen– this one with a pretty drawn-thread design), we installed a new toilet, beadboard panelling and molding.
My biggest money-saving tip is: Buy in advance when the deals are good. I knew we would be redoing the baths, so when I found things I wanted to incorporate, I would buy them and store them:
- The hotel rack came from a thrift store for $3
- The small hanging candle holder with prisms on clearance for $8 at Target
- The shelf over the tub was just $17 on clearance at Target as well (just like $59 ones I’d seen at PB).
- I mentioned previously how I found the light fixtures for both the baths at another clearance sale for $13 each.
- We bought all the windows at a discount window supplier.

The shower. This is the part where I beg and plead: if you are building a house, please make all the fixtures white. I think I shed some tears over this shower. The original shower was a fiberglass one-piece unit that was in good condition and I would’ve been happy to leave it in place but for one thing: it was yellow-gold. Almost all the way to the ceiling, and not easy to cover up like the tub in the other bath.
I searched and searched for a cost-effective shower surround, and let me just say, oh. my. goodness. You wouldn’t believe what they wanted for FAKE marble, people. And I wanted easy clean, which eliminated tile (like I would diy that, anyway!). I really wanted a smooth surface, but it couldn’t be found at a reasonable price.
In the end, we ended up replacing the gold shower stall with this $340 unit consisting of three wall pieces and the floor pan. And while I love that it’s white, it’s exactly what I feared: all the lines from the “fake tile” hold enough moisture to allow pink mold to form (in our climate, at least). Sigh. (The green towel hanging on the left is a microfiber cloth we use after each shower to help the mold not form as quickly).
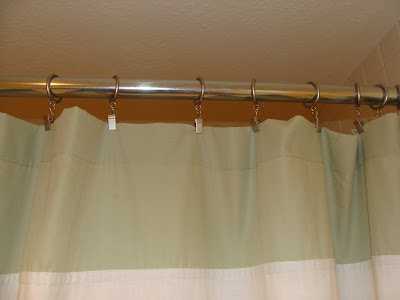
Here’s a little detail of the shower curtain. In order to have it hang closer to the ceiling, I added a piece of coordinating fabric to the top and bottom and then simply used curtain clips to hang it on the rod. Why a curtain on a shower instead of doors? Well, $300 dollars to start…but also I just can’t stand the cleaning issues with doors. Ugh, those tracks are awful.
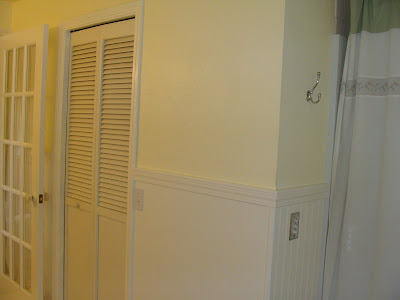
This is the view from the window which shows the bi fold doors to the closet. And see the hook next to the shower? I love this little touch- it’s there to hang your towel on when you are showering so you don’t have to reach too far.
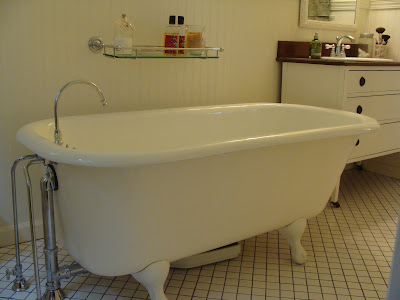
And here’s my favorite part of the room – our clawfoot tub. It’s also the reason this room cost more than twice what the other bath did. Ah, but I always wanted a clawfoot tub. And it is nice to soak in – regular tubs just don’t compare. Luckily, I didn’t know how much it would cost in the end, otherwise…who knows? Two pedestal sinks would’ve looked good here, too, and been A LOT cheaper. But I know I would’ve always wished for the tub…
Our tub was a “deal” on Craigslist bought two years before the renovation for $100. It was dirty so I thought it would just need a good cleaning. When it was finally time to do the remodel, we realized that the enamel was cracked on the bottom and therefore wouldn’t be water tight and needed to be refinished.
We then searched for a plumber to move the pipe from the wall to the floor to accommodate the tub. The first bid we got back was $1500! Aaack- that was the budget for the whole room. Talk about shock. We finally found someone who would do it for half the price if we did the finish part. Can you believe it- feeling like $700 was a deal?
After that I needed to buy the exposed pipes and faucet. Wow. I did not know they would be so expensive. So, how much did the tub cost in the end?
- Tub: $100
- Refinishing: $325
- Plumbing labor: $700
- Supply lines: $39.99 (a deal, believe it or not)
- Faucet and drain: $248.00 (*faint*)
- Total: one expensive tub
Moral? Be very sure that tub is worth it.
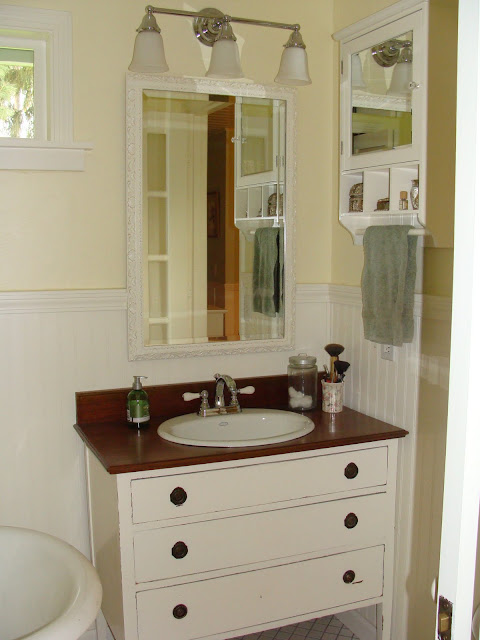
And here is the final corner of the room and our dresser-turned-vanity. The corner that wasn’t finished until a year and a half after the rest of the room was completed. We seriously had a “temporary” vanity here that had been cobbled together from the parts we had cut off of the old one. It wasn’t pretty- notice how I don’t have a picture?
But far be it from me to keep any secrets. I’m going to show it in all it’s glory in a post about remaking this dresser into a vanity (go here to see the tutorial to make a dresser into a vanity).
Why would I want to make a dresser into a vanity? Well, I like the look and I like the price: $70. And after the shock of the tub, $70 sounded real nice to me.
How did we come out in the end? The total to redo every surface and fixture in the room was just under $3,000 with the tub being about half. Which seems like a lot of money to me, and we never would have thought we had enough at one time to do it, but because we spread it out over a couple of years, we could afford it.
And I have the bathroom of my dreams. Well, until the next house, where I’m sure my dream will be something different.
PS – View this hilarious video that Brian made to get his take on the bathroom remodeling saga!
Linked to: Show Us Your Bathrooms
Your home is lovely and this bathroom remodel is amazing! Can we trade?! Love your tub.
Thanks for visiting and your sweet comment.
Your bathroom is amazing! Great job! and yes that tub is beautiful! I’ve been looking around for some freestanding bathtubs but not sure what to get, any suggestions?
Thanks
A dream master bath!
Sue @ Beach Bungalow
xo
Jo- we paid to have this done- we took it to a refinishing place and paid $300, but we feel it was worth it ’cause it’s beautiful and nice to bath in. 😉
How did you refinish your tub I have one in desperate need of refinishing and I have seen the kits but not sure if they work
Hi Jami! I’ll be featuring your bath today! Love it! Stop by and grab a featured button if you like! Thanks so much for joining the Sunday Showcase! ~ Stephanie Lynn