How To Make A Rustic Wall Clock
This rustic wall clock is easy to make, using tile grout and square-head nails. It also makes a unique and crowd-pleasing gift! Find more great gift ideas on the handmade gifts page.

Today I’m going to show you how to make an easy (I swear!) rustic wall clock. This makes a great gift- I made these a number of years ago for my family for Christmas and they all loved them. In fact, they were way more enthusiastic for them than I thought they’d be!
Isn’t this great? You won’t believe how easy it is and how inexpensive. Here’s what you need:
- One 11-7/8″ particle board round– I just found them at Home Depot in the wood section. I have no idea what they are intended for, but they were just right for this. It was awhile ago, but I think I paid about $2 for each.
- One bag of tile grout in the color you’d like your base to be. I chose a tan to be the most neutral, but it’s totally up to you. This will be about $8 and will obviously be way more than you need for one- this is why you should make a bunch at once for gifts. *smile* If you have grout leftover from a tiling job, kudos to you- repurpose it!
- 2″ square-head nails. When I made these, I could only find them online and I’ve no idea if they can be found in a store now. I found this online store that sells them now for $8.59/lb. and there are 120 nails in a pound, coming in at $1.40 for each clock.
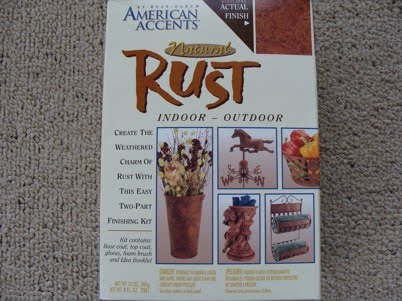
- Paint that mimics rust. The nails come as galvanized steel (or something silver), and I wanted a vintage look, so I applied this product to the nails- only on the tops, though, so I didn’t have to bother turning them over. It’s pretty easy and the finish looks just like rust. I paid around $10 for this, but I can’t find it online now, though I read someone who said they paid $15 for it. There are so many good spray paints now, you might be able to find something you like that way. A hammered black or oil-rubbed bronze may work just as well.
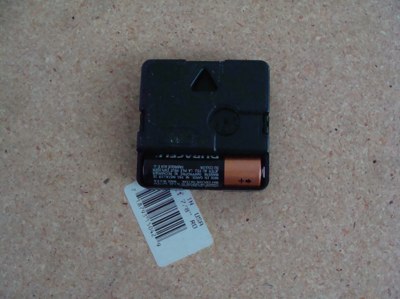
- A clock mechanism. These are found at craft stores and run about $5-6 dollars. I know I found mine a lot cheaper, so look around for a deal.
If you can get a clock kit for around $4.00, these clocks will cost about $10 each to make.

Here are the steps to make this rustic wall clock:
- Drill a hole the size you need (check on the clock kit package) in the middle of the particle board round.
- Apply rust or other paint to the metal nails and the brass (usually) clock hands. Make sure they are completely dry before moving to step three.
- Mix the grout according to package directions and apply to the particle board top and sides, leaving the hole in the middle clear. While the grout is wet, push the nails gently in place– I placed three opposite of each other in the 12, 3, 6, and 9 spots and single ones in the remaining spots (see pictures). Or create a design of your own.
- Let dry thoroughly before attaching the clock mechanism and hands according to the instructions on the package.
- Carefully wrap for gift-giving!
Want to save this?
Enter your email below and you'll get it straight to your inbox. Plus you'll get easy new recipes, gardening tips & more every week!

How to Make a Rustic Wall Clock
Tools
- Drill
- Putty Knife
- Paintbrush
Materials
- 1 11-7/8″ Particle Board Round I just found them at Home Depot in the wood section. I have no idea what they are intended for, but they were just right for this.
- 1 bag Tile Grout I chose a tan to be the most neutral, but the color is totally up to you.
- 20 2" Square-Head Nails When I made these, I could only find them online and I’ve no idea if they can be found in a store now. I found this online store that sells them now for $8.59/lb.
- Paint that Mimics Rust The nails come as galvanized steel (or something silver), and I wanted a vintage look, so I applied this product to the nails- only on the tops, though, so I didn’t have to bother turning them over. It’s pretty easy and the finish looks just like rust.
- 1 Clock Mechanism
Instructions
- Drill a hole the size you need (check on the clock kit package) in the middle of the particle board round.
- Apply rust or other paint to the metal nails and the brass (usually) clock hands. Make sure they are completely dry before moving to step three.
- Mix the grout according to package directions and apply to the particle board top and sides, leaving the hole in the middle clear. While the grout is wet, push the nails gently in place– I placed three opposite of each other in the 12, 3, 6, and 9 spots and single ones in the remaining spots (see pictures). Or create a design of your own.
- Let dry thoroughly before attaching the clock mechanism and hands according to the instructions on the package.
Notes
NOTE: I did not seal these in any way. The people I gave them to who hung them up and never moved them still have their clocks. Those that moved (or had kids who threw balls…) found that they didn’t travel well and the grout (on the sides, especially) fell off in pieces. I’m wondering now if some sort of sealant would protect them a bit more. I’d love to know if anyone finds (or already knows!) of something that would work.
–Jami
This is linked to:
Favorite Things Friday
Hodgepodge Friday
Hi! I just found this site today & I have to say that I LOVE many of your projects! I also live in the wet, wet, wet & muddy Willamette Valley & have for about 1/2 my life, the rest over in sunny Central Oregon! I loved this project & wanted to share one that I had come up with. I had an old, large (about 24″) wall clock that I had purchased at Win-Co several years ago for $10 on the clearance shelf, but children & life had damaged it past working condition. I recently pulled it out of the garage, were it’d been stashed since the kitchen remodel, & took it apart. I bought a new clockwork mechanism w/white hands & then painted the face with chalkboard paint. I then chalked in the numbers, attached the new hands & have a totally cool clock!
Ooo, you and I do think alike, Syrie – reusing and chalkboard! 😉 Thanks for sharing this clever idea!
Love this idea!!!
I have been wanting to make one of these forever! Thanks for sharing!
I really like that you used nails for the numbers. It keeps everything consistent and neat. What a great, inexpensive idea.
Oh, love it! 🙂
Thanks for sharing!
Sherry
OhMyGosh! I spent a couple hours scouring the house tonight for something unique to make a clock out of for my mantel. Yours is perfect…and I have everything on hand that I need. My square nails are from our house…kept everyone I came across when we remodeled. I can’t wait for the weekend so I can get to this project! I’ll post when I’m done and send them back to you for your great tutorial. Thanks!
Very nice!! Thanks for the intructions!! I may try this one of these days. =0)
What an awesome and creative idea! They are great and no wonder all the gift recipients were so enthusiastic with such a thoughtful gift.